< SUGURI
Stage 1, Stage 2, Stage 3, Stage 4, Stage 5, Stage 6, Stage 7
Stage 5 - Night Flight[]
This stage is notable for having enemies appear in large formations. Also, the stage boss Kyoko protects herself with large live ammunition throughout the battle. Due to this, penetrating weapons like Buster, Shock and Flamethrower work miracles here. Keep in mind that the latter two have very limited range. The Spread gun works as well, but you need master its use or you will get hit by the beamspam. The Pilebunker can help you get past Kyoko’s crystals.
As a reward for persevering against Kae’s onslaught you get to enjoy this stage and its catchy music. This stage has plenty of enemies filling the screen with Beam bullets while shooting homing missiles: make good use of penetrating weapons to get rid of them as soon as possible. Most of them appear in rows: position yourself in a way that your penetrating weapons hit them all.
While you approach the air fortress of the enemy army you pass by battleships. A warning sign flashes either from above or below and a row of missile launchers appears. The Buster can take out multiple of them with one attack. After you destroy them all or enough time passes the battleship flies away and regular enemies return. The beamspamming enemies are joined by laser beam shooting aircrafts. The laser covers a wide area of the screen but it’s not much of a threat. If you run out of space, simply dash from one side of the screen to the other.
At one point in the stage warning signs flash from both above and below while there are still enemies on the screen. Missile launchers appear from both the top and the bottom. Use a Hyper here to reduce the amount of hostiles. If you have a penetrating hyper and/or the Buster equipped, you can do the following: Move to one of the corners of the screen. Once both ships come into view press the FAREST target button. The missile launcher in the opposite corner will be targeted. Move up or down to align yourself with the missile launchers and fire your penetrating weapon. Voila, the entire missile launcher row gets destroyed in one elegant strike.
Take out the last regular enemies and warning signs will flash on the right side of the screen: move to the left edge of the screen and be ready.
There is no mid boss in this stage. Instead, the screen blurs and huge missiles fly into the screen. Time is slowed down due to the Accelerator effect even if you don’t possess the weapon. It will return to real-time if you get hit though so watch out. Don’t be afraid to defend yourself with an Hyper attack if you think you’re about to get it, the following boss will give you plenty opportunity to replenish your gauge.
Boss: Kyoko (9000 HP)[]
Kyoko is the polar opposite of Kae. Instead of attacking recklessly she fights very defensively. She summons large crystals to shield herself and limit your movement. Due to this the battle might take a while if you didn’t bring penetrating weapons. Her attack pattern during the first gauge isn’t too elaborate and it’s fairly easy to gather 3 Hyper gauges for her later phases. This fight isn’t nearly as hectic as the previous one. Don’t rush Kyoko, be as calm as she is and analyze her attack patterns.
Enemy attack patterns[]
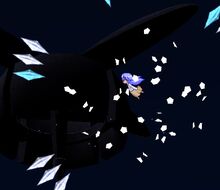
Ice Crystal

Live ammunition damage: 400
Durability: 250
Comment: Appears either in a ring around your or next to Kyoko. Homes in at after a few seconds.
Frozen Emblem[]

Live ammunition damage: 400
Durability 250
Comment: Shatters into Icicles flying in all directions after about 5 seconds.
Ice Wall[]

Live ammunition damage: 400
Durability: 200
Comment: Shatters into Icicles flying towards the left after about 5 seconds. Create a gap, use a Hyper or the Pilebunker to get past the wall.
Crystal Icicles[]

Live ammunition damage: 400
Durability: 130
Avalanche[]


Live ammunition damage: 500
Durability: 350
Comment: If you don’t have any Hyper left try to move towards the edge of the screen for an easier escape.
Autumn Rain[]


Beam damage: 500
Comment: Her fastest attack, close range weapons like Shock and Flamethrower should be used carefully.
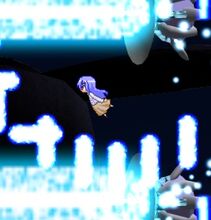
Cold Stream[]


Beam damage: 500
Comment: Finding a safe spot to fire can be tricky, thus you should walldash instead. Watch out for Ice Crystals or Icicles obscured by the bullets.
Calm Stream[]


Beam damage: 400
Comment: Starts moving at the edge of the screen from Kyoko's second health gauge on. Allows you to gather Hyper gauge easily.
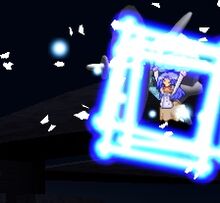
Square Beam Reflection[]

Beam damage: 500
Laser bots[]

Beam damage: 600